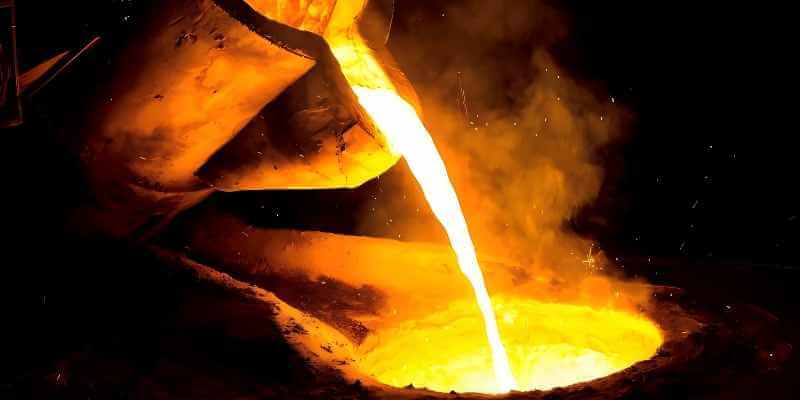
Aluminum melting represents a versatile process that seamlessly transitions between industrial manufacturing and artisanal metalworking applications.
Today, aluminum plays a crucial role in aerospace, automotive, construction, and packaging due to its lightweight, corrosion resistance, and conductivity. Because of this, recycling and melting aluminum has gained significant attention.
Whether you’re a hobbyist or a professional, understanding the basics of aluminum melting—such as temperature control, equipment selection, and safety measures—can make a big difference.
In this guide, we’ll break down the key principles and methods to help you melt aluminum efficiently and safely. Let’s dive in.
Key Properties of Aluminum
Aluminum has unique characteristics that affect how it melts. Understanding these properties will help you achieve better results when working with this metal.
Aluminum Melting Point
Pure aluminum melts at 660°C (1220°F), but most aluminum you’ll work with contains alloys or impurities that change this temperature. For example:
- Aluminum-silicon alloys (common in cast parts) melt at 570-630°C
- Iron or copper contamination may require higher heat
- Magnesium-added alloys need careful temperature control
If you’re melting scrap aluminum, check its composition first. Different batches may need adjusted heating times or temperatures.
The Oxidation Problem
When aluminum is heated, it quickly forms a thin layer of aluminum oxide (Al₂O₃). This oxide layer causes several problems in the melting process.
First, it slows down heat transfer, making it harder to melt the metal efficiently. Second, it traps impurities in the melt, reducing the quality of the aluminum.
Finally, if the oxide layer mixes into the liquid metal, it can weaken castings and lead to defects. Proper techniques are needed to minimize these issues.
How to prevent oxidation:
Use flux—a mix of sodium fluoride and potassium chloride breaks up the oxide layer
Stir carefully—gentle stirring with a graphite rod helps without creating more oxide
Industrial solutions – Vacuum melting or argon gas protection for high-quality results
These properties make aluminum easy to melt but require attention to detail. Next, we will examine the principles of aluminum melting and the functionality of various heating techniques.
Principles of Aluminum Melting
Understanding how heat transfers to aluminum helps you melt it efficiently. Each heating approach functions uniquely, with specific benefits and limitations.
Heat Transfer Methods
- Conduction (Crucible Heating)
Crucible walls transfer heat directly to molten aluminum. This method is simple but works slowly, making it best for small batches. Since heat spreads unevenly, constant stirring is needed to prevent hot spots.
- Convection (Gas Furnace)
Hot gases circulate around the metal to heat it. This is faster than conduction but less precise in temperature control. To reduce oxidation, flux must be added to the melt.
- Radiation (Induction Heating)
Electromagnetic waves heat the metal directly without contact. This is the most efficient method, with over 85% energy efficiency. It also provides excellent temperature control, staying within ±5°C of the target.
Temperature Risks & Control
Aluminum becomes hazardous when heated above 800°C (1472°F). At this point, it absorbs hydrogen gas, leading to bubbles in castings. It also forms thick oxide layers and wastes energy.
For safe and efficient melting:
- Maintain temperatures between 700 and 750°C for optimal results.
- Use thermocouples for continuous monitoring and infrared thermometers for quick spot checks.
- Visually inspect the melt—properly heated aluminum flows smoothly like water and should not glow red.
- This ensures better metal quality and safer operation.
How to Melt Aluminum: Step-by-Step Guide
Successful aluminum melting demands meticulous planning and precise implementation throughout the process.
Whether you’re using a small DIY setup or industrial equipment, following these steps systematically is key. This approach helps achieve clean, efficient melts and high-quality castings.
Let’s break down the entire process from raw material preparation to final pouring.
Step 1: Preparation
Proper preparation ensures clean, efficient melting. First step: classify your aluminum stock. Pass a magnet over the pieces to identify and remove any ferrous-containing alloys.
Next, remove contaminants—soak parts in acetone for paint removal or bake at 400°C to burn off organics. Finally, break down large pieces—use bolt cutters or a hammer to create fist-sized chunks.
This increases surface area for faster melting. Wear gloves and goggles during this process—some coatings release toxic fumes when heated.
Step 2: Loading
Loading technique prevents “bridging” (where metal blocks jam). For crucible furnaces, place large chunks at the bottom and smaller pieces on top.
Leave 20% empty space for expansion. In induction furnaces, stack materials vertically along the coil’s magnetic field. For gas furnaces, spread pieces evenly across the hearth.
Never dump all material at once—add gradually as the melt progresses. Use steel tongs to adjust position if needed. Proper loading reduces melting time by 30% versus haphazard packing.
Step 3: Melting
Induction Furnace Melting Aluminum
Start by warming up your furnace slowly. Preheat it to 500°C—this protects the lining from cracking when cold metal hits it.
Load your aluminum strategically: put heavy chunks at the bottom and lighter scraps on top. This setup melts faster and avoids “bridging” (where scraps block heat flow).
Now power on the electromagnetic coils! These create swirling currents inside the metal itself, heating it from within. Melting times typically range from 10 to 15 minutes for quantities below 50 kg, while heavier batches may require 30 minutes or more.
Once fully liquid, add a teaspoon of refining flux (like sodium fluoride) per kilogram of aluminum. Stir gently for 2 minutes—this makes impurities clump into easy-to-remove slag.
Check your temperature now:700-750°C is the sweet spot for most casting. Too hot? Let it cool naturally. Too cold? Boost power briefly.
Pro tip: Use a ceramic-coated thermometer—infrared guns sometimes misread shiny molten metal! Skim off the grayish slag layer, then pour quickly for clean casts.
Reverberatory Furnace Melting Aluminum
This furnace melts using radiant heat bouncing off its roof and walls (“reverberation”). Distribute the aluminum evenly across the hearth, ensuring there are no thick piles. Uneven loads create hot spots that waste energy and risk overheating the furnace floor.
Light your gas burners or electric elements. Expect 1-2 hours for full melting (faster for thin scraps, slower for dense ingots).
Hydrogen gas is aluminum’s enemy—it causes bubbles in finished casts. Fight it with a rotary degasser: lower the spinning rotor into the melt and pump in argon gas. Tiny argon bubbles rise through the metal, grabbing hydrogen like a magnet.
After degassing for 5-8 minutes, let the molten aluminum rest undisturbed for about 10 minutes. This equalizes temperature and alloy mix.
Check heat: 710-740°C works for most jobs. Finally, open the tap hole or tilt the furnace to pour. Keep slag back with a skim bar!
Crucible Furnace Melting Aluminum

Got a backyard? Build a simple furnace! Construct a cylindrical enclosure from firebricks, then direct a propane torch through a side opening to begin the melting process.
Always prep cans first: bake them at 400°C for 10 minutes to burn off paint/lacquer (do this outdoors!).
Drop clean aluminum into a graphite crucible—it handles heat better than steel. Position the propane torch flame at the crucible’s base for optimal heat transfer.
Melting takes 15-45 minutes depending on wind and can quantity. Safety first:Wear a full-face shield, leather gloves, and natural-fiber clothes (no synthetics!).
Once molten, you’ll see a crumbly gray “dross” layer form. Skim it off with a steel spoon. Work fast now! Molten aluminum starts oxidizing within minutes. Pour into molds immediately after skimming. Pro tip: Lightly coat molds with soapstone wash—it prevents sticking!
Step 4: Refine Molten Aluminum
First, tackle impurities! Sprinkle slag remover over your molten aluminum. Use 1-2% of your total metal weight.
Stir gently for 60 seconds—watch impurities clump into grayish “dross” on the surface. Skim this gunk off with a perforated spoon.
The next critical step involves identifying hydrogen gas (responsible for pore formation in casts). Lower a rotary degasser tube into the melt.
Blow argon or nitrogen bubbles through the metal for 3-5 minutes. These bubbles act like scavengers—they grab dissolved hydrogen and float it to the surface.
Pro tip: To avoid slag being trapped in bubbles, always degas after skimming.
Step 5: Casting
Preheat molds to 200-250°C first. Skip this, and you’ll risk “cold shuts” (weak seams where metal flows meet) or incomplete fills.
Use a heat gun, oven, or even place molds near the furnace while melting. Keep them covered until pouring to hold heat.
Pour steadily but not fast! Tilt your crucible or furnace slowly to avoid turbulence and air bubbles. Pour steadily without interruption until the molten metal reaches 5 mm from the mold’s top edge. Always wear a face shield and Kevlar gloves—molten aluminum splashes like hot water!
For sand or ceramic molds: Let casts cool naturally overnight. Slow cooling = stronger, crack-resistant parts.
For metal molds: Speed things up with fans or light water sprays after 2-3 minutes. Quick cooling = finer grains = harder surfaces.
Pro move: Tap molds gently with a mallet right after pouring. This shakes bubbles upward before solidification!
Safety Precaution
Handling molten aluminum at 660°C demands rigorous safety measures—this liquid metal poses invisible yet severe hazards. A single safety lapse can cause life-changing injuries.
However, with proper protective equipment and disciplined protocols, these risks become manageable, enabling safe and productive work. Let’s examine the essential precautions.
1. Personal protection

Treat your protection like armor: a carbon-fiber face shield (not just goggles!) stops liquid metal splashes that cause permanent eye damage.
Heavy split-leather gauntlets must cover wrists—regular gloves won’t cut it when handling 700°C crucibles. Wear a welder’s apron made of flame-resistant leather or Kevlar®; cotton burns, and synthetics melt into skin.
Safety footwear with steel reinforcement prevents foot injuries from falling crucibles (graphite becomes brittle at high temperatures).
Always work outdoors or under industrial fume extraction—melting a single painted can releases enough zinc oxide fumes to cause “metal fume fever” (chills, nausea for days).
1. Emergency Response
Leaking molten aluminum? Throw dry sand or sodium bicarbonate instantly—water reacts explosively, spraying superheated metal.
If a crucible cracks, don’t move it! Let the spill solidify in place, then break it apart cold.
Metal fires? Class D extinguishers only (look for yellow labels marked “For Metal Fires”). No Class D? Bury flames under a 3-inch layer of sand—standard ABC extinguishers fuel aluminum fires.
For skin contact, immerse burns in cool water for 20 minutes minimum—molten aluminum sticks and keeps burning. Cut away clothing only after cooling.
2. Common Issues when Melting Aluminum
Gray/black melt surface? That’s runaway oxidation. Apply a gas shield: add 0.3% flux (1 tbsp/kg of metal) and coat the melt surface, then cover the crucible with a graphite lid. Reduce stirring—each plunge introduces oxygen.
Castings with honeycomb holes? Hydrogen gas is the culprit. Vigorously degas: employ a rotary wand to argon bubble for a minimum of 8 minutes. Check your environment: humidity above 60%? Moisture sneaks into melts via damp tools or humid air—preheat everything to 150°C.
Slag cementing to crucible walls? Overheating or dirty scrap is to blame. Maintain a maximum melt temperature of 720°C, verified with a Type-K thermocouple. Always pre-roast scrap at 200°C for 20 minutes to vaporize oils, paints, and moisture trapped in crushed cans.
Pro Wisdom That Saves Fingers:
Bake all steel tools before use—a single drop of sweat on tongs vaporizes into steam, blasting hot metal upward.
Never melt beverage can tabs: their magnesium content flares violently at melting temps.
Heard a hissing sound? Evacuate immediately—it signals moisture explosion risk.
How to Choose Aluminum Melting Equipment
Melting aluminum can be simple or complex, depending on your goals. Whether you’re a hobbyist casting small parts, a small business producing custom pieces, or a large foundry recycling scrap, the right melting equipment makes all the difference.
The three main options are:
- Induction furnaces (best for precision and speed)
- Reverberatory furnaces (best for large-scale melting)
- Crucible furnaces (best for DIY and small projects)
Each type has pros and cons. Let’s examine each option in detail to help you select the most suitable solution.
Induction Furnace
Induction furnaces use electromagnetic fields to melt metal quickly and efficiently. They don’t rely on flames, so they heat aluminum evenly without hot spots.
Benefits:
- Speed: Melts small to medium batches (10–500 kg) in just 10–30 minutes.
- Energy Efficient: Converts about 85% of energy into heat, saving power costs.
- Precision Control: Keeps temperatures within ±5°C, perfect for sensitive alloys.
- Clean Operation: No open flames mean less oxidation and cleaner metal.
Downsides:
- High Cost: Small models start at $5,000–$10,000, while industrial systems can cost $50,000+.
- Maintenance Needed: Requires skilled operation and regular upkeep.
- Power Demands: Needs a strong electrical supply, which may require upgrades.
Best For:
- Small to medium workshops (10–500 kg batches).
- Aerospace, automotive, and high-quality casting where alloy consistency matters.
- Foundries that need repeatable, fast melting cycles.
If you need speed, precision, and efficiency, an induction furnace is the best choice—if you can afford it.
Reverberatory Furnace
Reverberatory furnaces are the go-to choice for industrial-scale melting. They use gas or electric heating to melt 1–10 tons of aluminum at once.
Benefits:
- Huge Capacity: Handles massive loads, perfect for recycling plants.
- Uniform Heating: The large chamber distributes heat evenly.
- Fuel Flexibility: Can run on natural gas, propane, or electricity.
Downsides:
- Slow Heating: Takes 1–2 hours to fully melt a batch.
- Low Efficiency: Only 50–60% energy conversion, leading to high fuel costs.
- High Maintenance: The refractory lining wears out and needs frequent replacement.
Best For
- Large foundries and recycling centers that process tons of aluminum daily.
- Automotive and industrial casting where volume matters more than speed.
- Operations with steady, high-volume demand.
If you need to melt tons of aluminum per day, a reverberatory furnace is the way to go—just expect higher operating costs.
Crucible Furnace
Crucible furnaces are the most affordable option, great for hobbyists and small workshops.
Benefits:
- Low Cost: A DIY setup can cost under $100.
- Operation is simple: melt metal by heating a graphite or ceramic crucible with a propane torch, charcoal, or an electric furnace.
- Portable: Small and lightweight, so you can move it around.
Downsides:
- Slow Melting: Takes 20–40 minutes for small batches (1–10 kg).
- High Oxidation: Open flames expose aluminum to air, causing dross.
- Short Lifespan: Graphite crucibles last ~50 melts, steel ones need coatings.
Best For:
- Hobbyists, artists, and DIY metalworkers.
- Melting cans, scrap, or small custom castings.
- Beginners learning metal casting.
If you’re just starting or only melt small amounts, a crucible furnace is the best budget-friendly
Final Tips for Choosing the Right Equipment
- Budget?
- Under $100? → Crucible furnace.
- $5,000–$50,000? → Induction furnace.
- Industrial-scale funding? → Reverberatory furnace.
- Volume?
- 1–10 kg? → Crucible.
- 10–500 kg? → Induction.
- 1+ tons? → Reverberatory.
- Precision Needed?
- Only induction furnaces give ±5°C control.
Which One Should You Pick?
- Hobbyist? Start with a crucible furnace.
- Small business? An induction furnace saves time and energy.
- Large foundry? A reverberatory furnace handles heavy loads.
Choose wisely, and you’ll melt aluminum faster, cheaper, and safer for your needs.
| Equipment Type | Heating Method | Suitable Scale | Advantages | Disadvantages |
|---|---|---|---|---|
| Induction Furnace | Electromagnetic Induction | Small/Medium Batch | High efficiency (85%), Precise temperature control | High initial cost |
| Reverberatory Furnace | Gas/Resistance Heating | Industrial Scale | Large capacity (ton-level) | High energy consumption, Slow heating |
| Crucible Furnace | Direct Flame Heating | DIY/Small Scale | Low cost (from $50) | Low efficiency, High oxidation risk |
Now that you understand the different melting equipment options, let’s explore how to apply this knowledge practically.
For hobbyists starting with small-scale projects, the crucible furnace method offers the most accessible entry point.
The following section will guide you through melting aluminum cans at home using basic, affordable tools while maintaining proper safety standards.
How to Melt Aluminum Cans at Home

Melting aluminum cans at home is a fun recycling project that lets you turn scrap metal into cool DIY creations. With some basic equipment and safety precautions, you can set up a backyard foundry in no time.
Here’s everything you need to know about this fascinating process that transforms everyday trash into valuable metal.
What You’ll Need
First, gather these essential supplies:
Heat source – A propane torch (at least 100,000 BTU) works best. Charcoal grills can work too but take longer.
Crucible – This holds the molten aluminum. You can use a steel can lined with refractory cement or buy a graphite crucible (20-50).
Insulation – Fire bricks or ceramic fiber blankets keep heat inside your furnace.
Safety gear – Heat-resistant gloves, a face shield, and long sleeves are must-haves.
Tools – Tongs for handling hot metal, a steel rod for skimming slag, and molds for casting.
Step 1: Prepare Aluminum Cans
Before melting, clean your cans properly:
- Remove labels by baking them at 400°C for 10 minutes or soaking in acetone.
- Crush cans flat—this saves space and helps them melt faster.
- Avoid cans with plastic liners (like some energy drinks).
Step 2: Build DIY Furnace
A simple furnace takes minutes to set up:
- Stack fire bricks into a square enclosure, leaving a gap for your torch.
- Place your crucible inside—make sure it sits stable and centered.
- Add insulation around the sides if using ceramic blankets.
For improved thermal distribution, angle the torch downward to ensure heat envelops the crucible’s walls.
Step 3: Melt Aluminum Cans
Now for the exciting part:
- Fill your crucible halfway (overfilling risks spills).
- Fire up your torch and heat cans in circular motions.
- In 20-30 minutes, you’ll see shiny liquid metal!
- Use a steel rod to remove black slag (impurities) floating on top.
Step 4: Pour Molten Aluminum
For best results:
- Preheat molds to 200°C (cold molds can crack from thermal shock).
- Pour quickly in one smooth motion to minimize oxidation.
- Let cool completely before handling—solidified aluminum stays hot!
Safety First
- NO WATER NEAR MOLTEN METAL – Even damp tools can cause steam explosions.
- Work outdoors only – Melting paint releases toxic fumes.
- Keep a D-class fire extinguisher or dry sand nearby – Water makes aluminum fires worse.
- Wear all protective gear – Molten metal splashes are no joke.
Troubleshooting Tips
Problem 1: Metal won’t melt.
Check the torch flame—it should be bright blue, not yellow. Add more insulation if heat escapes.
Problem 2: Excessive smoke.
Cans weren’t cleaned well. Let fumes dissipate, and wear a respirator next time.
Problem 3: Brittle final product.
Too much slag got poured in. Skim more thoroughly next melt.
This rewarding hobby combines recycling with practical craftsmanship. Start with small batches, master the fundamentals, and you’ll soon be creating impressive metalwork.
Remember: Each can you melt keeps aluminum out of landfills while building your skills.
Pro tip: Keep a casting journal to track your progress and refine your techniques over time. Happy metalworking!
Conclusion
Aluminum melting is a technical process that requires knowledge of materials science and thermodynamics. Whether for industrial use or DIY projects, proper equipment selection and safe operation are crucial.
This guide covers all key aspects—from understanding aluminum’s properties to choosing the right furnace type. We explain step-by-step melting techniques and essential safety measures. By following these methods, you can achieve quality results while working safely.
The process offers great potential for both professional applications and creative projects. With practice and attention to detail, anyone can master aluminum melting and turn scrap metal into valuable products. Always prioritize safety and enjoy this rewarding metalworking skill.